Iris Shaders Mod is a modern and high-performance shader loader designed for Minecraft: Java Edition. Built to support nearly all existing OptiFine shader packs, Iris offers a powerful alternative to traditional shader mods while fully integrating with Sodium, one of the most popular performance optimization mods for Minecraft. Whether you’re aiming to boost your FPS or enjoy cinematic visuals, Iris delivers both beauty and efficiency.
Iris Shaders
🌟 What Is Iris Shaders Mod?
Iris Shaders is a free and open-source Minecraft mod that allows players to use stunning visual shader effects – like dynamic lighting, realistic water reflections, atmospheric fog, and more – without needing OptiFine. It’s designed from the ground up to be compatible with modern rendering engines, and it unlocks the potential for smooth shader experiences even on mid-range hardware.
Unlike many other shader mods, Iris is built to integrate seamlessly with Sodium, offering a unique balance between visual quality and performance. This combination makes it a preferred choice for players who want shaders but also care about maintaining high FPS.
💡 Key Features of Iris Shaders
✅ Compatible with OptiFine Shader Packs
Iris supports almost all existing shaders made for OptiFine, including BSL, SEUS, Complementary, and more. You don’t need to convert or reconfigure anything – just install and enjoy.
🚀 Full Support for Sodium
Iris is one of the only shader mods designed to work alongside Sodium, giving you the best of both worlds: smooth gameplay and enhanced graphics.
🎨 Customizable Shader Settings
Iris lets you fine-tune bloom, depth of field, motion blur, color grading, and more. Whether you want a soft cinematic feel or vibrant and sharp visuals, it’s all tweakable from the in-game menu.
🌅 Realistic Lighting and Effects
Iris enables advanced shader features like dynamic shadows, screen-space reflections, realistic ambient occlusion, and volumetric lighting turning your Minecraft world into a visual masterpiece.
🔄 Frequent Updates and Open-Source Transparency
As an open-source project, Iris benefits from constant community development, faster bug fixes, and early adaptation to new Minecraft versions. You’ll always be up to date with the latest improvements.
🛠️ Why Use Iris Over OptiFine?
While OptiFine has long been the go-to mod for Minecraft shaders, Iris offers a cleaner, faster, and more modular solution especially when combined with Sodium. OptiFine can conflict with other performance mods and lacks some modern optimization techniques. In contrast, Iris focuses solely on shader rendering, allowing for higher compatibility with other mods and better stability on modern systems.
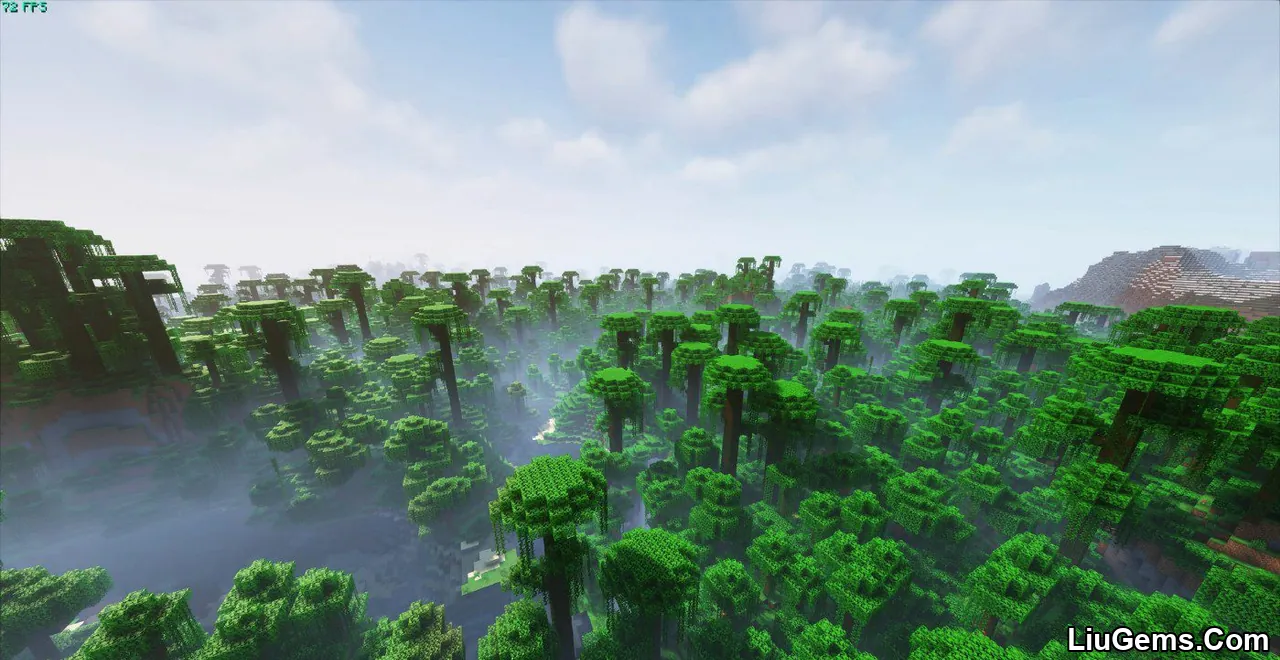
Screenshots:


How to Use Iris Shaders Mod
Once you’ve installed Iris, verify that the installation was successful by opening Minecraft and navigating to the Video Settings menu. If Iris is correctly installed, the layout of the settings should look noticeably different – featuring additional shader options and advanced graphical controls.

You’ve likely noticed that the video settings menu looks entirely different now. That’s because it has been redesigned by Sodium, the performance-enhancing mod that works alongside Iris.
In the General and Quality tabs, you’ll find all the familiar settings from vanilla Minecraft, allowing you to tweak the visuals to suit your preferences.
However, the options under the Performance and Advanced tabs are more technical – it’s generally recommended not to adjust these unless you know what you’re doing.
To manage your shaders, head over to the Shader Packs tab. Here, you can easily enable, disable, or switch between installed shader packs. The shader pack interface should appear like this:

This menu displays all shader packs currently located in your shaderpacks folder. To add new ones, you have two simple options: either drag and drop the .zip files directly into the menu, or click the “Open Shader Pack Folder…” button to open the folder manually and place your shader packs there.
Once your new shaders are in the folder, click the refresh icon in the top-right corner of the menu to update the list.
To enable shaders, first click on “Shaders: Disabled” – this will turn shader support on. Then, simply click on the shader pack you want to use, followed by the Apply button to activate it.
In the example below, Complementary Shaders has been successfully enabled. You’ll notice that the font color of the selected shader turns yellow, indicating it is currently active.

Once you’ve enabled a shader pack, you can fine-tune its appearance by clicking on the “Shader Pack Settings…” button. This will open a configuration menu specific to the selected shader.
Keep in mind that each shader pack has its own unique set of settings, as these options are defined by the shader developer. Some packs offer simple toggles for effects like bloom or motion blur, while others provide in-depth controls for lighting, atmosphere, color grading, and performance optimizations.
For example, when using Complementary Shaders, the settings menu may include multiple tabs with organized categories such as lighting, water, sky, performance tweaks, and more – giving you full control over the visual experience.

Once inside the Shader Pack Settings menu, you’ll find all the customization options made available by the shader pack itself. These options are typically identical to what you’d see when using OptiFine, ensuring full compatibility and a familiar experience for long-time users.
In the top-right corner, you’ll also see several useful tools:
 Import button: Load a preset shader settings file (in .txt format). This is handy for applying pre-made configurations found online.
 Export button: Save your current shader settings into a .txt file for backup or sharing with others.
 Reset button: To revert all settings back to default, hold Left Shift and click the Reset button.
After you’ve customized the shader to your liking, click Apply to save your changes. You can then go back to the Shader Pack List or return to the Video Settings menu by clicking “Done”.
In-Game Shader Controls
Once you’re playing the game, Iris provides several handy keyboard shortcuts for quick shader management:
Press O – Opens the shader pack menu with a transparent background, allowing real-time previews.
Press K – Toggles shaders on or off instantly.
Press R – Reloads the currently active shader pack.
These keybinds can be customized in the Controls menu if you prefer different shortcuts.
Requires:
Fabric API or Quild Loader or NeoForge Installer
🛠️ How to Install Iris Shaders Mod (1.21.8, 1.20.1)
1, Download the Iris Shaders Mod Installer
Scroll to the download section below and save the .jar installer file anywhere on your computer.
2, Run the Installer
- You must have Java installed to run the installer. If not, download Java from Adoptium.
- If you’re on Windows and the installer doesn’t open, use Jarfix to fix .jar file associations.
3, Installer Window Setup
Once the installer opens, follow these steps:

In the “Select game version” dropdown, choose your preferred Minecraft version (e.g., 1.20.1 to 1.21.8).
Click the Install button.
4, Launcher Type Prompt
If prompted:
- Choose Microsoft Store / Xbox if you use the new Minecraft launcher.
- Otherwise, select Standalone (Win32) for the classic launcher.

Finish Installation
When the progress bar completes, you’ll see the message:
✅ “Installation succeeded!”

Now close the installer.
6, Launch Minecraft with Iris Shaders
Open your Minecraft Launcher. You should now see a new profile labeled something like:
Iris & Sodium (Minecraft 1.21.8) (version numbers may vary)

Select this profile and click Play to launch Minecraft with Iris Shaders enabled.
Next time when you open the Minecraft launcher, you should have the following profile (the version numbers may be different): Play the game with this profile selected to run Iris Shaders.
Download links
- fabric:download Download file
- fabric:download Download file
- fabric:download Download file
- fabric/quilt:download Download file
- Fabric / Quilt:download Download file
- Fabric / Quilt:download Download file
- fabric/quilt:download Download file
- fabric/quilt:download Download file
- fabric/quilt:download Download file
- Fabric / Quilt:download Download file
- fabric/quilt:download Download file
- fabric/quilt:download Download file
- fabric/quilt:download Download file
- fabric/quilt:download Download file
- fabric/quilt:download Download file
- Fabric/Quilt:download Download file
- NeoForge:download Download file
- Fabric/Quilt:download Download file
- NeoForge:download Download file
- Fabric/Quilt:download Download file
- NeoForge:download Download file
- Fabric/Quilt:download Download file
- NeoForge:download Download file
- Fabric/Quilt:download Download file
- NeoForge:download Download file