Minecraft clients are modified versions of the vanilla game that add powerful new features like PvP enhancements, custom GUIs, FPS boosters, and more. Whether you’re looking to improve your performance in competitive modes like Crystal PvP, or just want a smoother survival experience, installing a client is easy once you know the steps.
Quick Steps:
- Visit a Client Download Page
Browse a trusted website like LiuGems Minecraft Clients to explore available clients. - Download Your Favorite Client
Pick one based on your preferences (e.g., ghost clients, PvP-focused, anarchy-ready, etc.). Click the Download link in the post and confirm the download in the new tab that opens. - Install the Client:Option 1: JAR Installer File
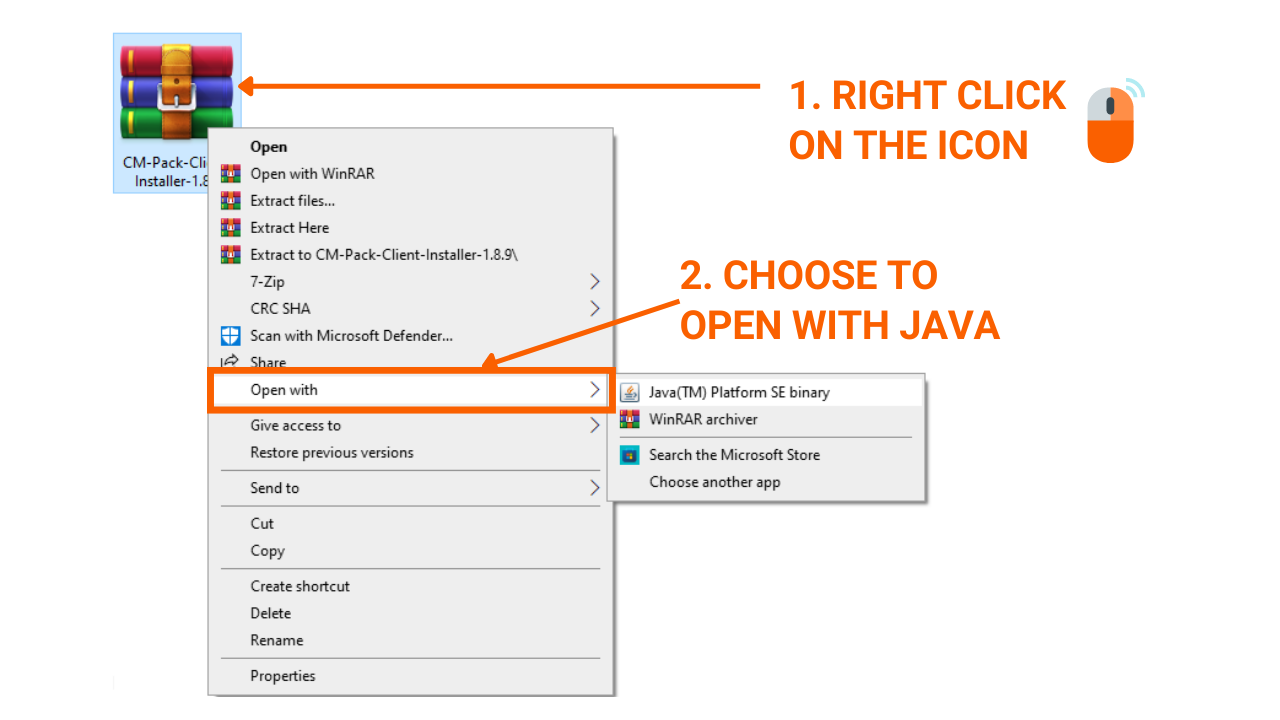
- Right-click the
.jarfile and select “Open with Java”. - Follow the installer prompts to finish setup. Some may open Minecraft Launcher directly.
- If needed, click “Install” within the setup window.
- Extract the downloaded
.zipfile. - Press Windows + R, type
%appdata%, and hit Enter. - Open the
.minecraftfolder, then theversionsfolder. - Move the extracted client folder into
versions.
- Right-click the
- Launch Minecraft with the Client
- Open the Minecraft Launcher.
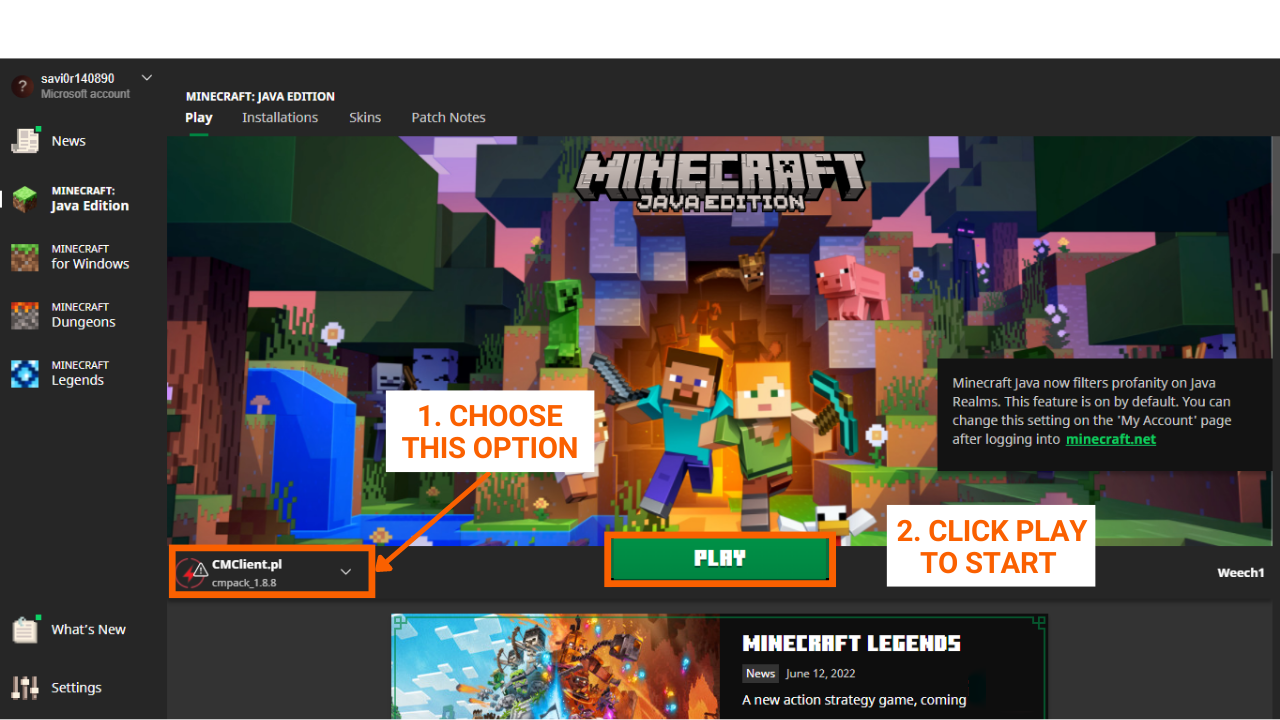
- From the version dropdown, select the client you just installed.
- Click Play, and enjoy your enhanced Minecraft experience.
Detailed Walkthrough:
Step 1: Find the Right Client
Go to LiuGems Minecraft Clients section. You’ll see a variety of clients some optimized for PvP (like Grim or Prestige), some for anarchy, and others for cosmetics or utility.

Each post provides:
- Screenshots
- Feature list
- Supported versions
- Download links
Step 2: Download the Client
After picking the client that fits your style:
- Scroll to the bottom of the post.
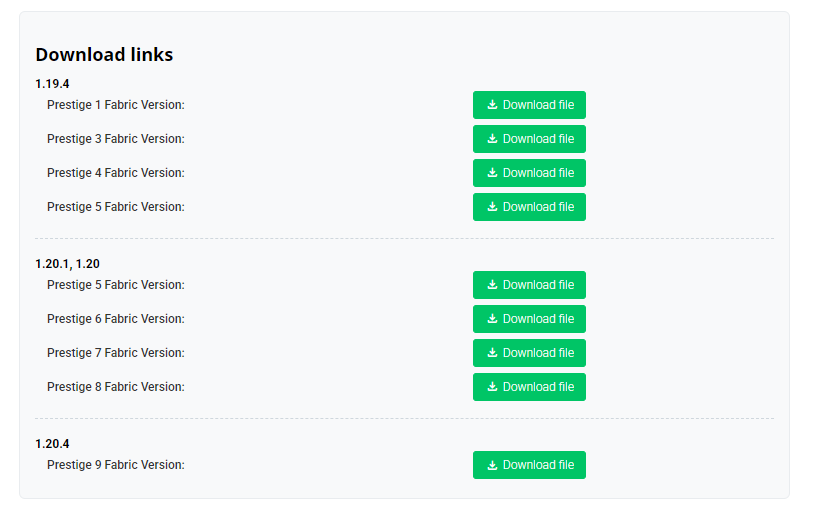
- Click on the download link.
- A new page or tab may open CLICK HERE TO DOWNLOAD button to begin.

Make sure to allow downloads in your browser and that you have Java installed for JAR files.
Step 3: Install the Client
3.1 If You Downloaded a JAR File (Installer Version):
- Right-click the file → Open with Java.
- Let the installer run. Some clients auto-launch Minecraft.
- If prompted, click Install and wait for confirmation.
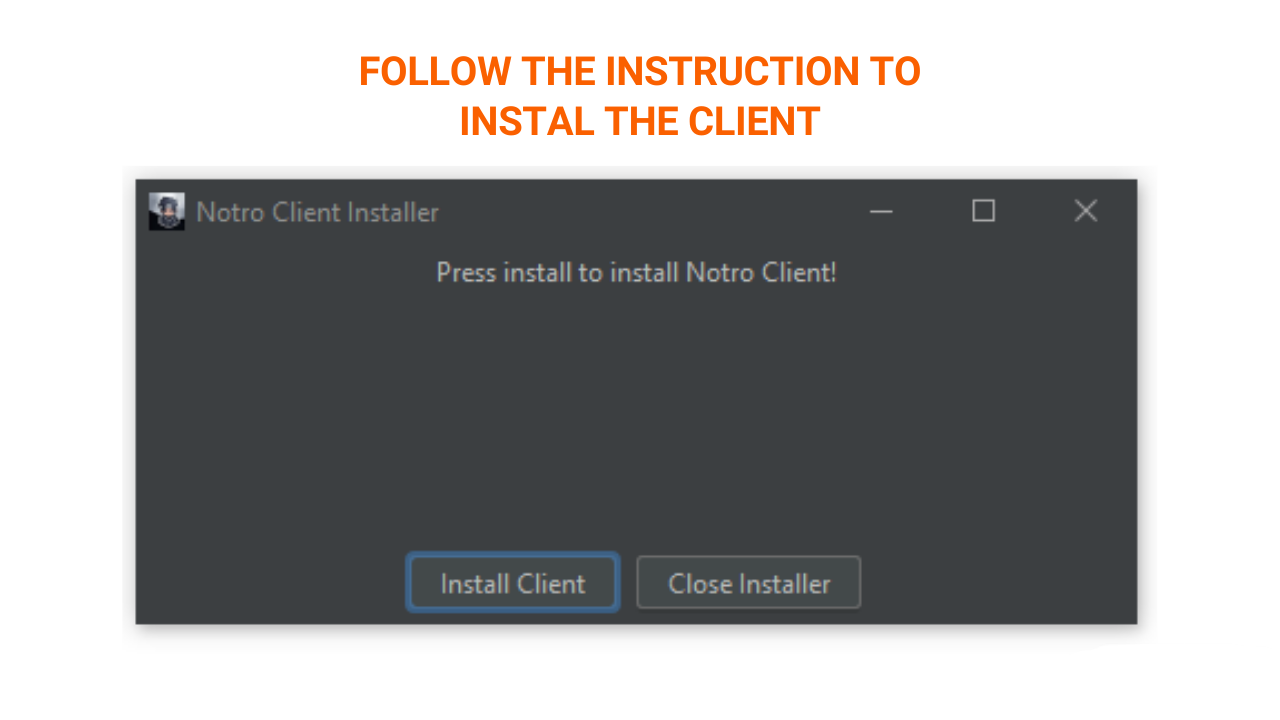
- You’re done. The client version will now appear in your Minecraft Launcher.
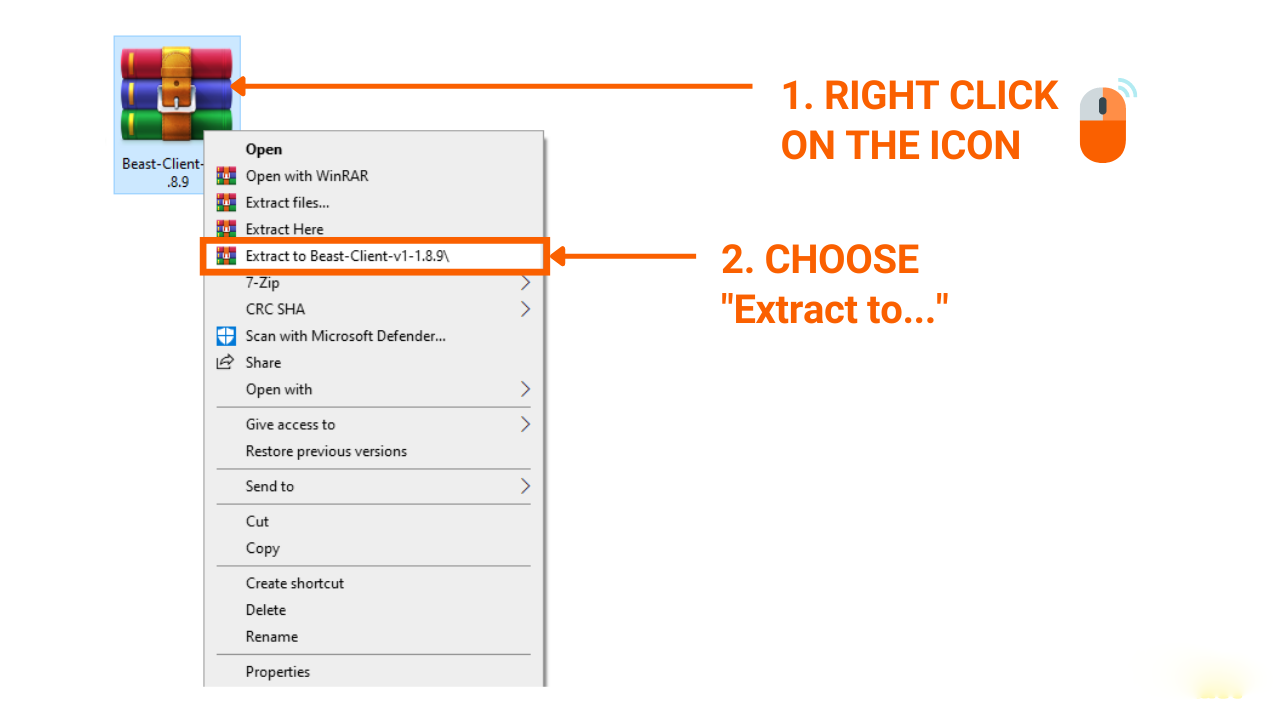
3.2 If You Downloaded a ZIP File (Manual Version):
- Extract the ZIP file using WinRAR or built-in extractor.
- Press Windows + R, type
%appdata%, then press Enter. - Navigate to:
Roaming > .minecraft > versions
- Drag the extracted folder (which contains
clientname.jsonandclientname.jar) into theversionsfolder.
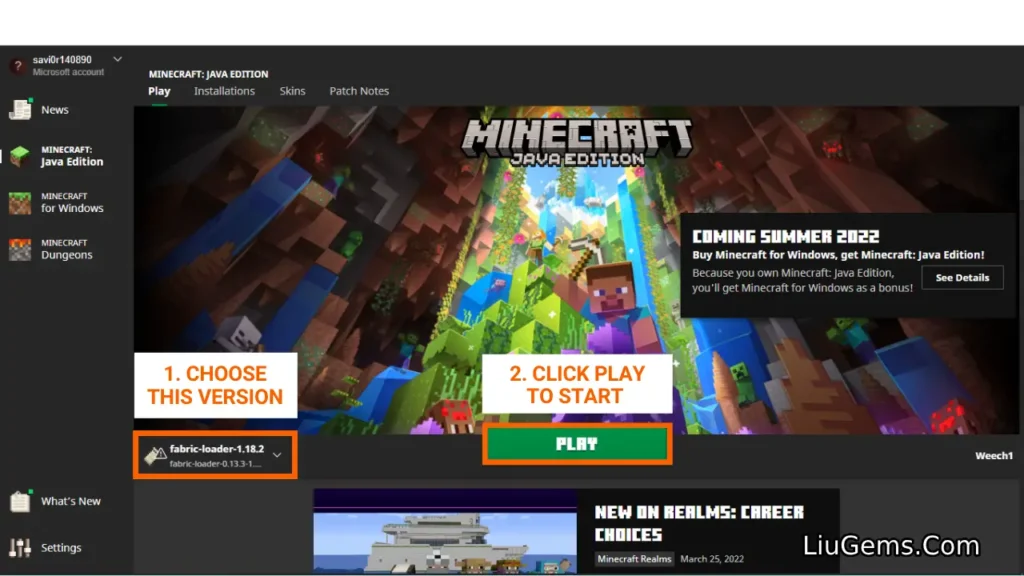
Step 4: Launch the Client
- Open the Minecraft Launcher.
- Click on the dropdown arrow next to the version and select the client (e.g., “Grim”, “Litka”, “Prestige”).
- Click Play and enjoy the new features.
If the client requires Java 17 or specific settings (like disabling FastRender), refer to its instructions before launching.
⚠️ Additional Notes:
- Many clients require Java 17 (downloadable from Oracle).
- Always disable antivirus alerts for false positives if the client is from a trusted source.
- Never use ghost clients or hacked clients on servers unless you know it’s allowed. Use them on anarchy or private worlds for safety.
- If you don’t see the client in the launcher, make sure:
- The folder structure in
.minecraft/versionsis correct - The
.jsonand.jarfiles are inside a folder named exactly like the version
- The folder structure in
🔧 Troubleshooting:
| Problem | Solution |
|---|---|
| Client not showing in launcher | Check folder name and file structure in .minecraft/versions |
| JAR file not opening | Install Java 17 |
| Stuck on loading screen | Disable FastRender and set Graphics to Fancy |
| Lag spikes or stutters | Check video settings and reduce shaders or background mods |